Character Creation For Character Animation

Development of my Character
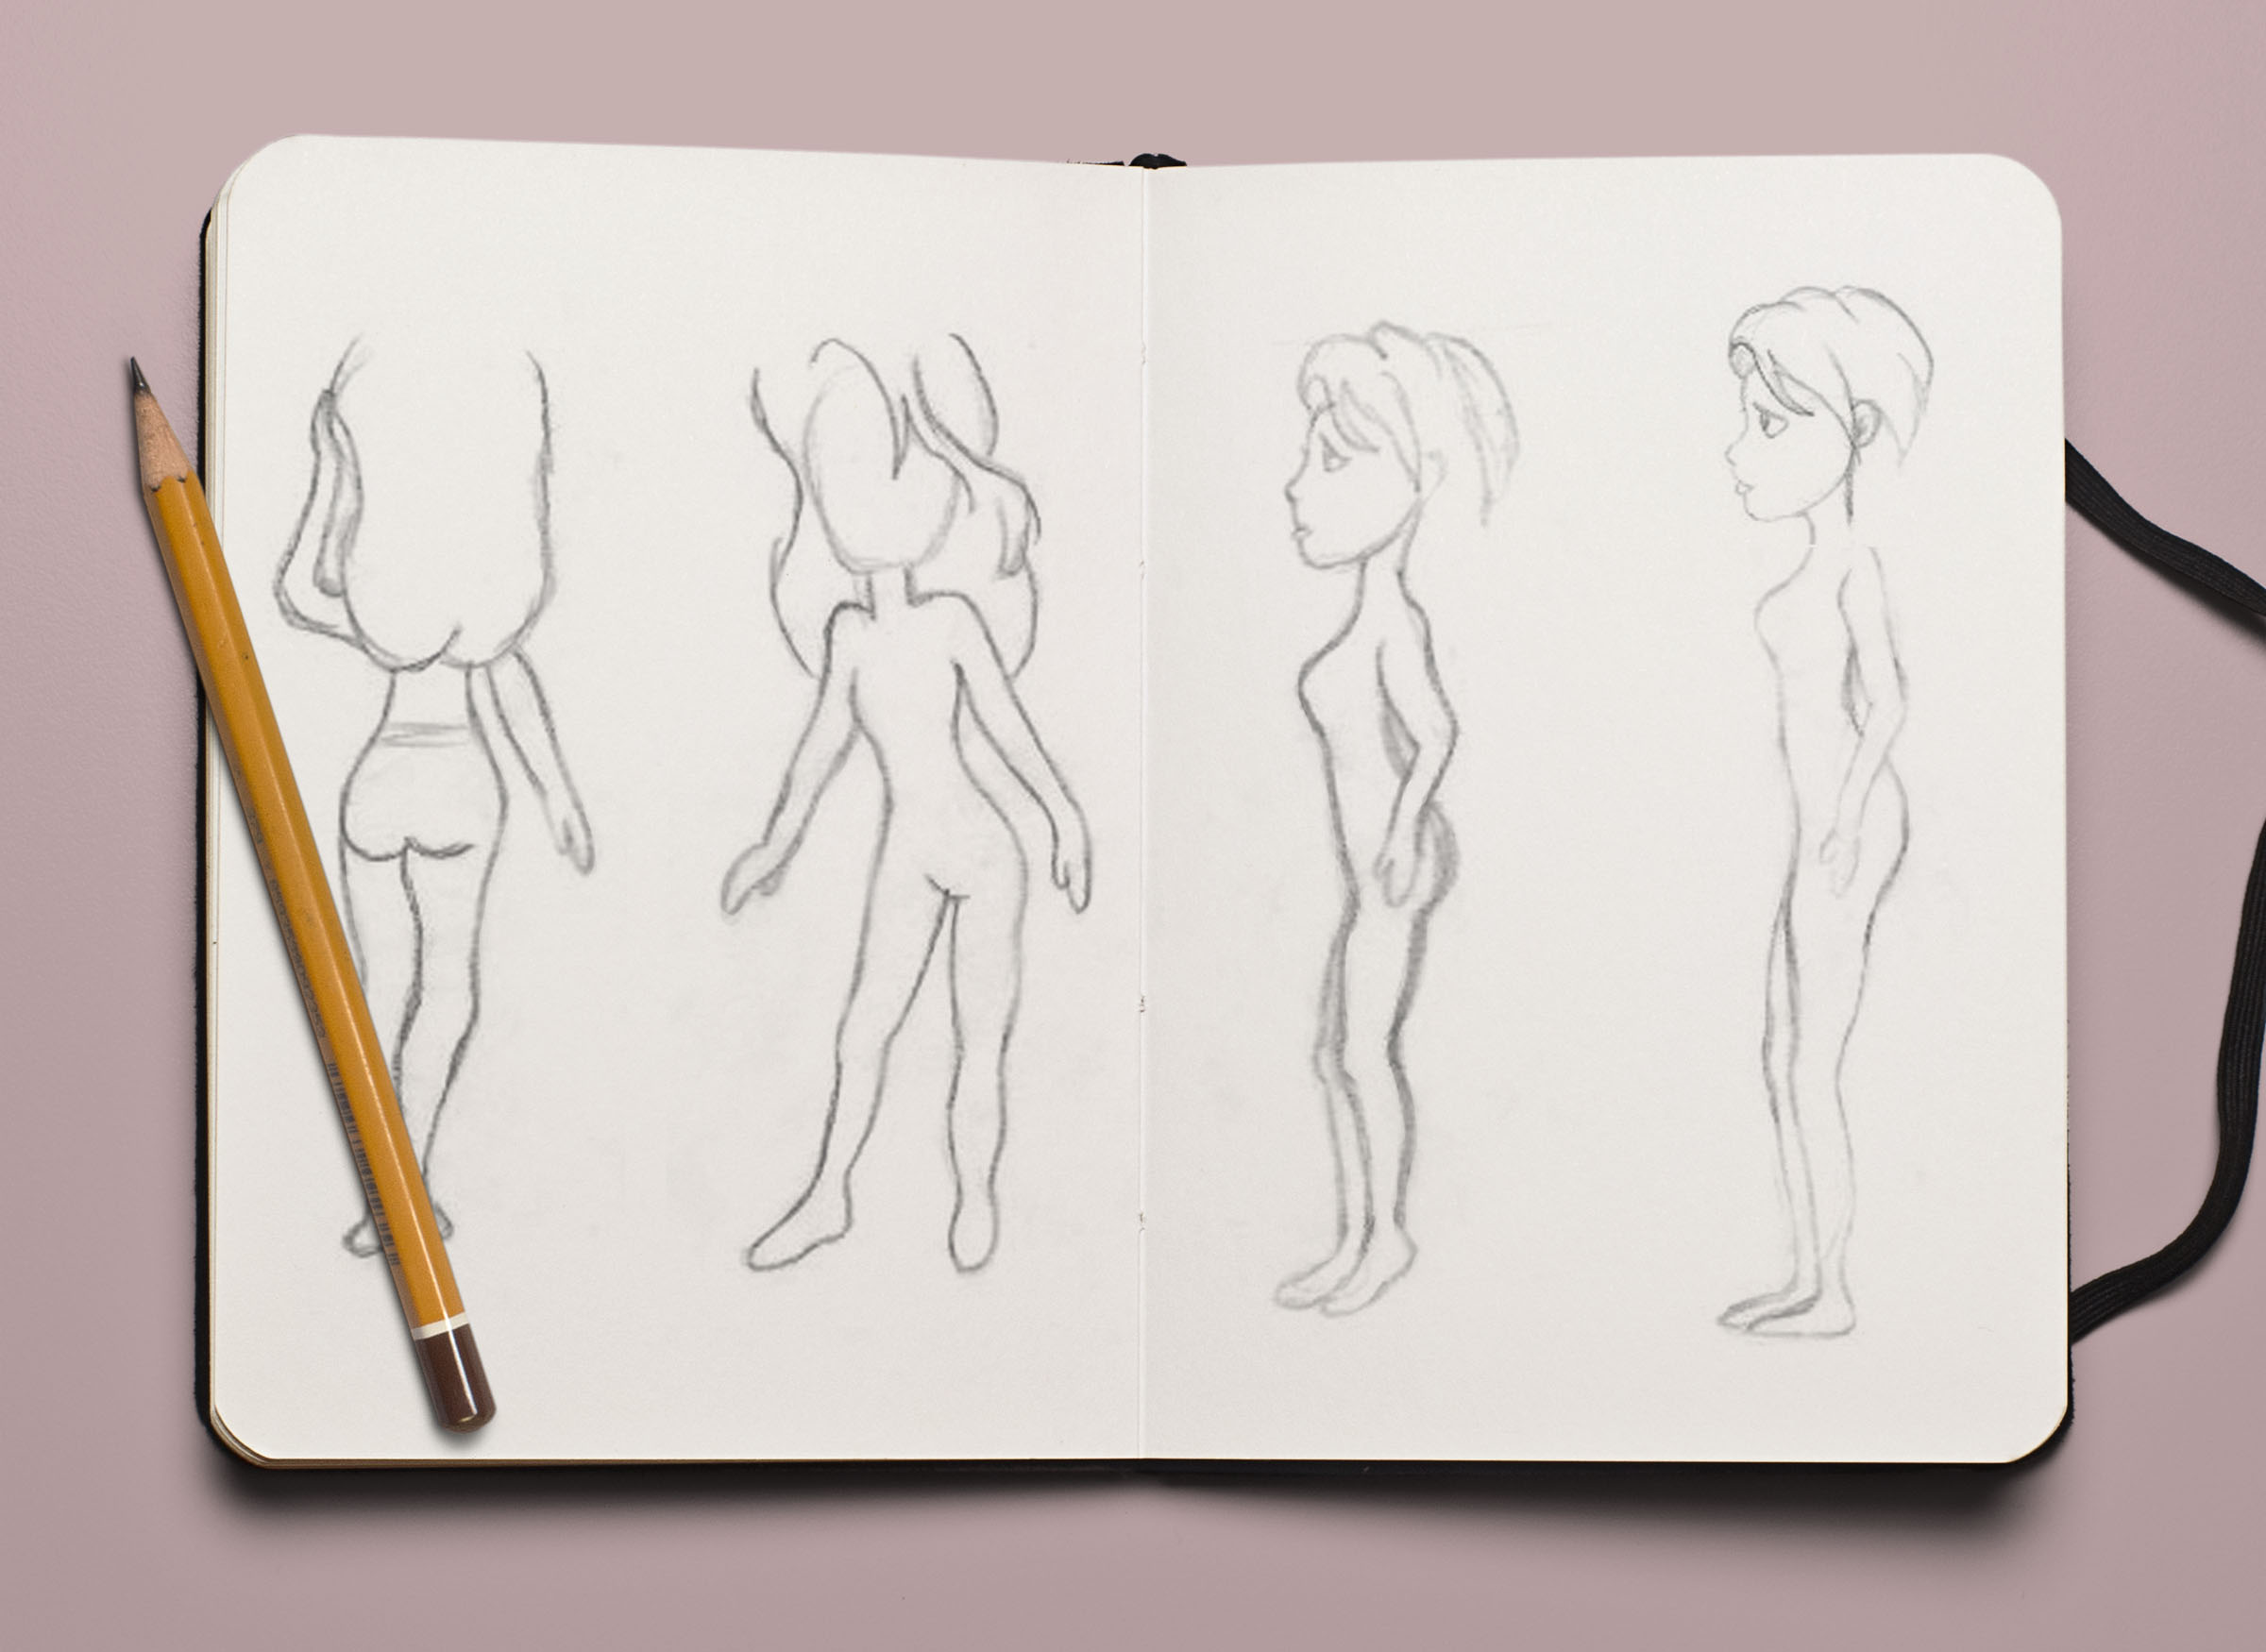
This is where my character started, starting out on tracing paper with some circles and some lines. With this very basic first drawing I could make a height guide, another piece of tracing paper with some more lines on it. Adding more and more bits of tracing paper as I go trying different body shapes, faces, positions; I ended up with a booklet worth of small sketches.
The development of my character was crucial in this project, It’s not like you can just whip one up and animate it. I kept building on this booklet until I settled on a body shape then deciding what she’d wear before deciding face and hair and having a final character. These are just a few of those drawings and the image above are the stages of settling on each aspect.
Initial Ideas
These are some of the first sketches after my lines and circles, the two on the left is my interpretation of Roxanne from The Goofy Movie. This helped me get the body in proportion while still being a cartoon like character rather than going down a realistic route.
The drawings on the right are finding the right shape for the side profile, my animation will be a walk cycle and more if I have the time, so a side profile is crucial for the first steps of animation. Drawing the face from the side was a lot more challenging than from the front, I ended up with quite a few heads way too big for the body. It wasn’t an issue, it was further development and something I was able to edit when scanning the drawing in.
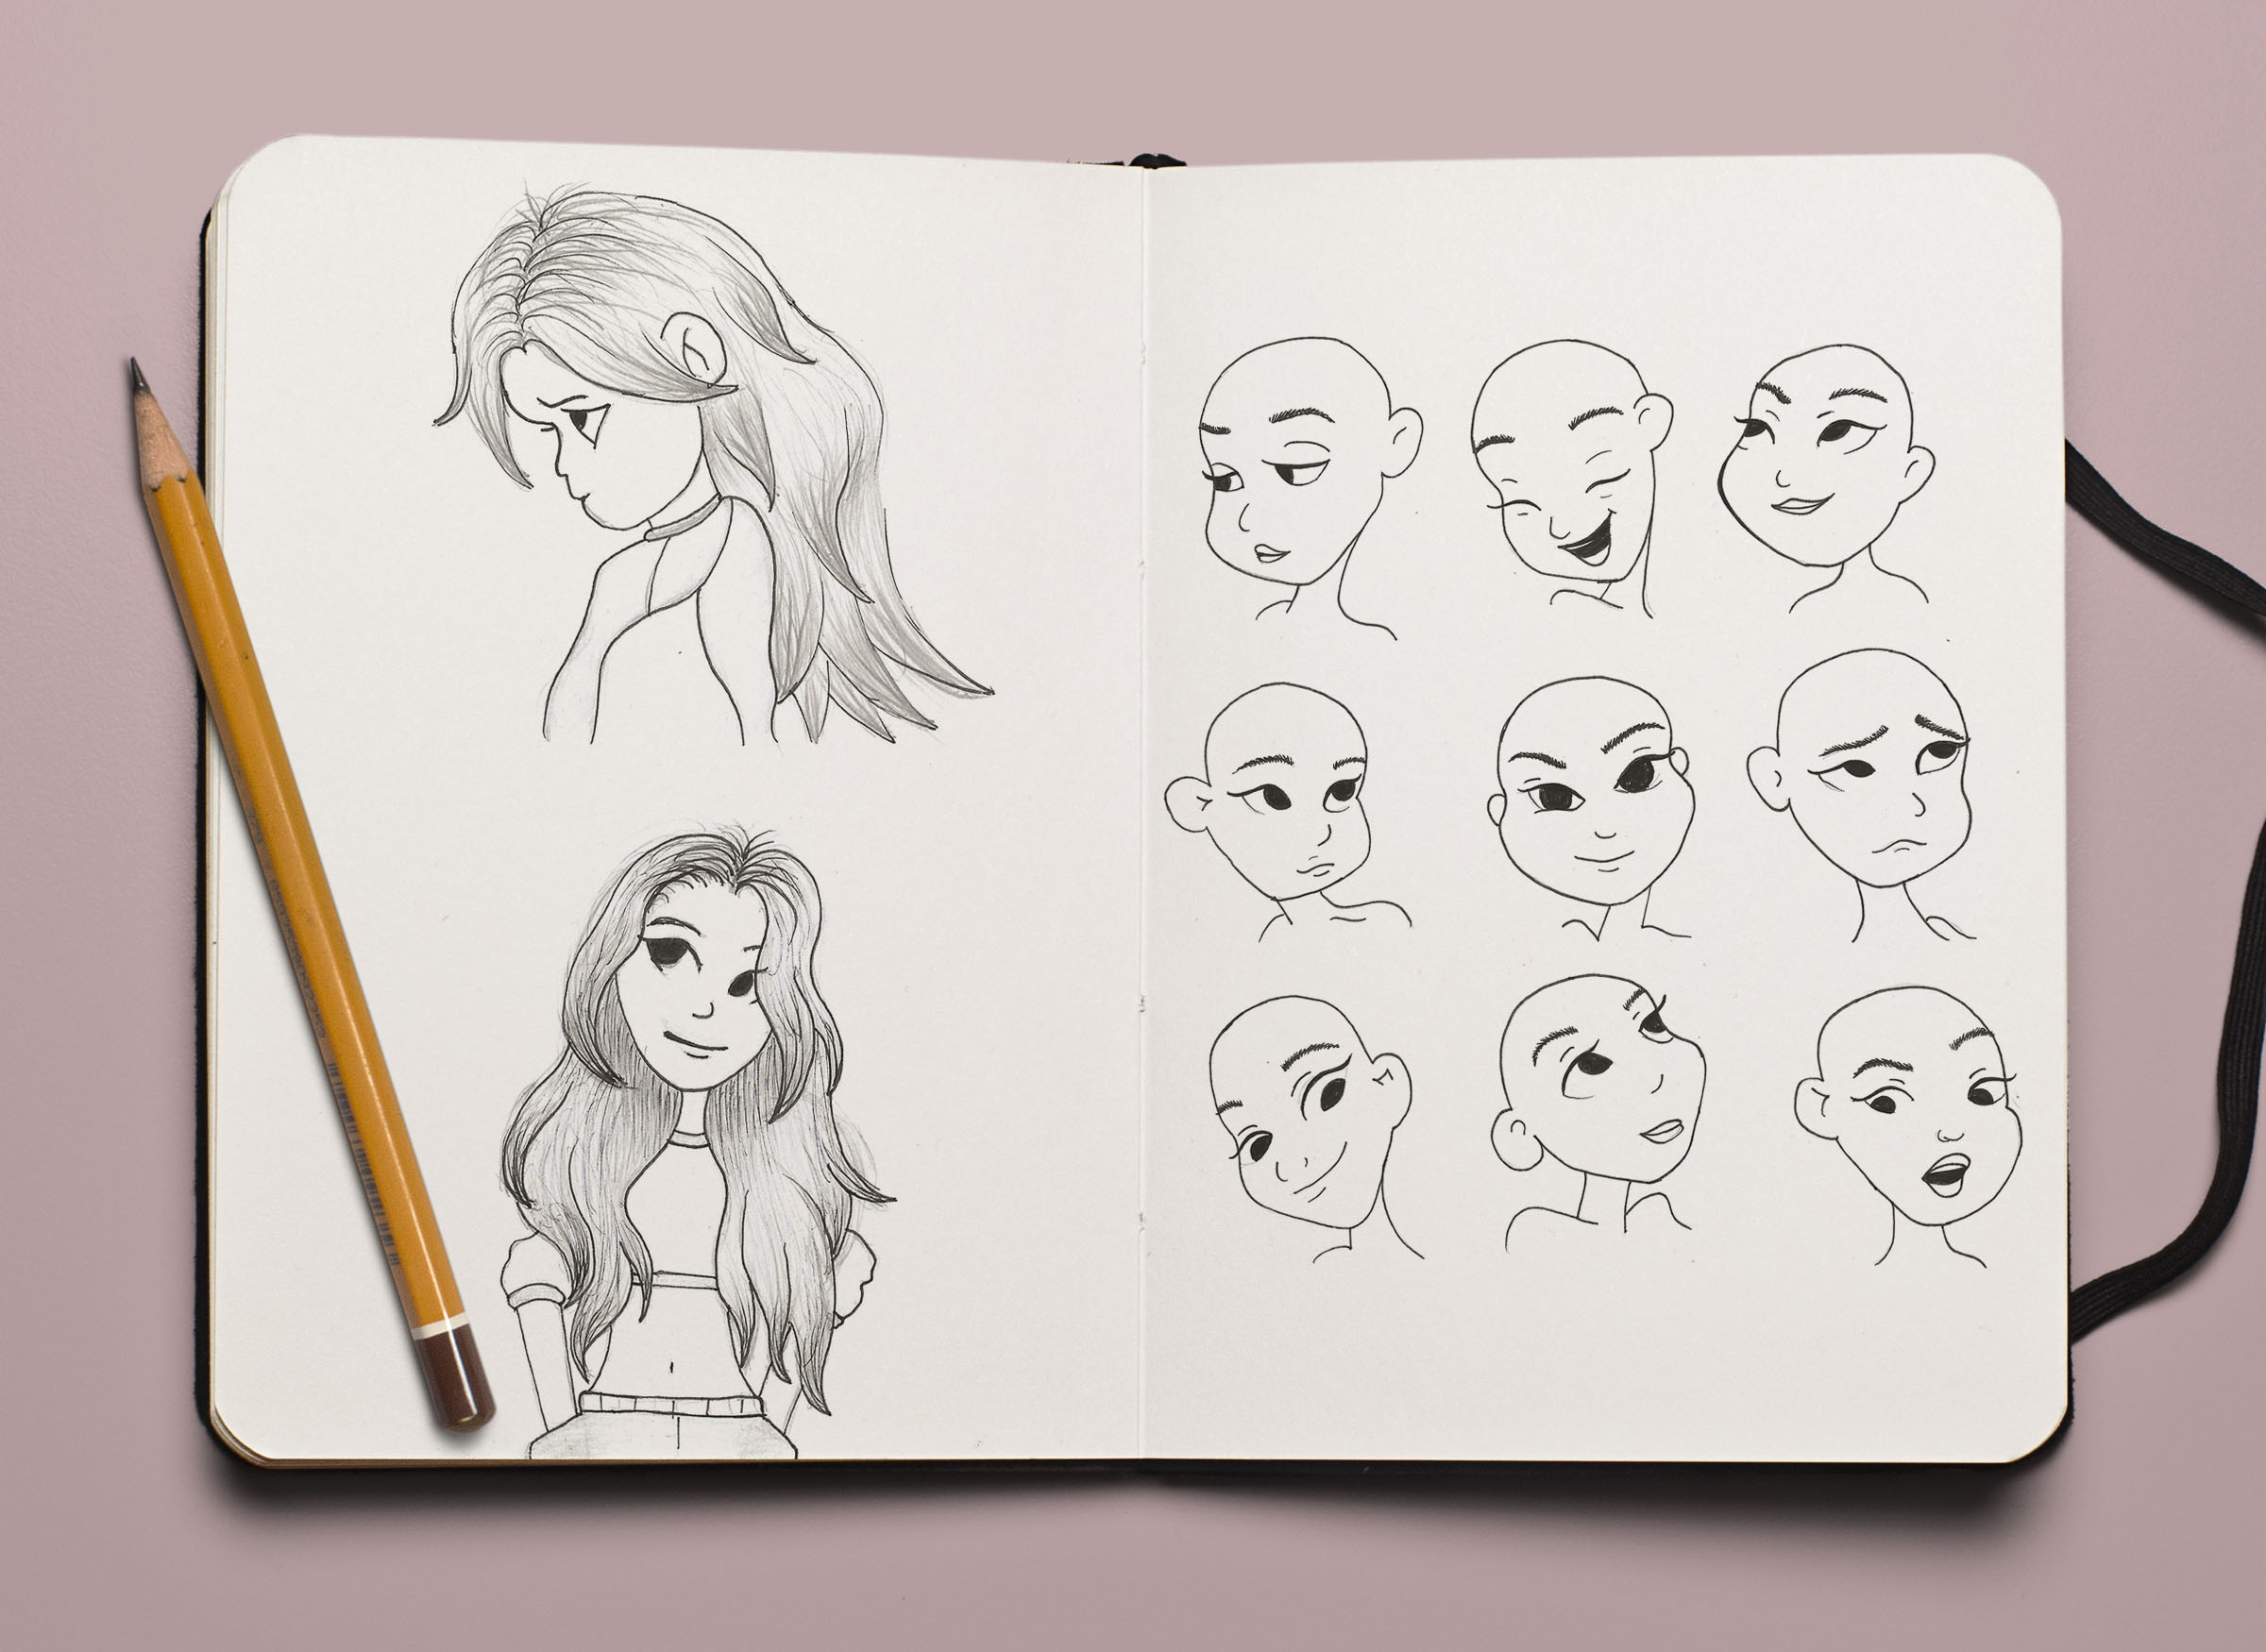
Expressions Guide
This was my favourite thing to do. The ideas were starting to come in about what my character was going to be up to and getting a bit of a story line together, she needed more than just one face. And quite frankly I’d gone off the one I originally drew. Having an idea of what my character would be going through gave the inspiration of the emotions, I got my sister to pull faces while I captured aspects of her expression. Starting off with just the facial features before adding head tilts and having the character turned to one side.
I developed a few of my favourite expressions into my completed character, a sad/timid look and a sassy one. I knew I wanted my character to be quite shy at first but realistically she can be quite lively. So I think these really suited what I wanted her personality to look like. They add to the progression of the character and start to create a style guide for the character.
Going Digital
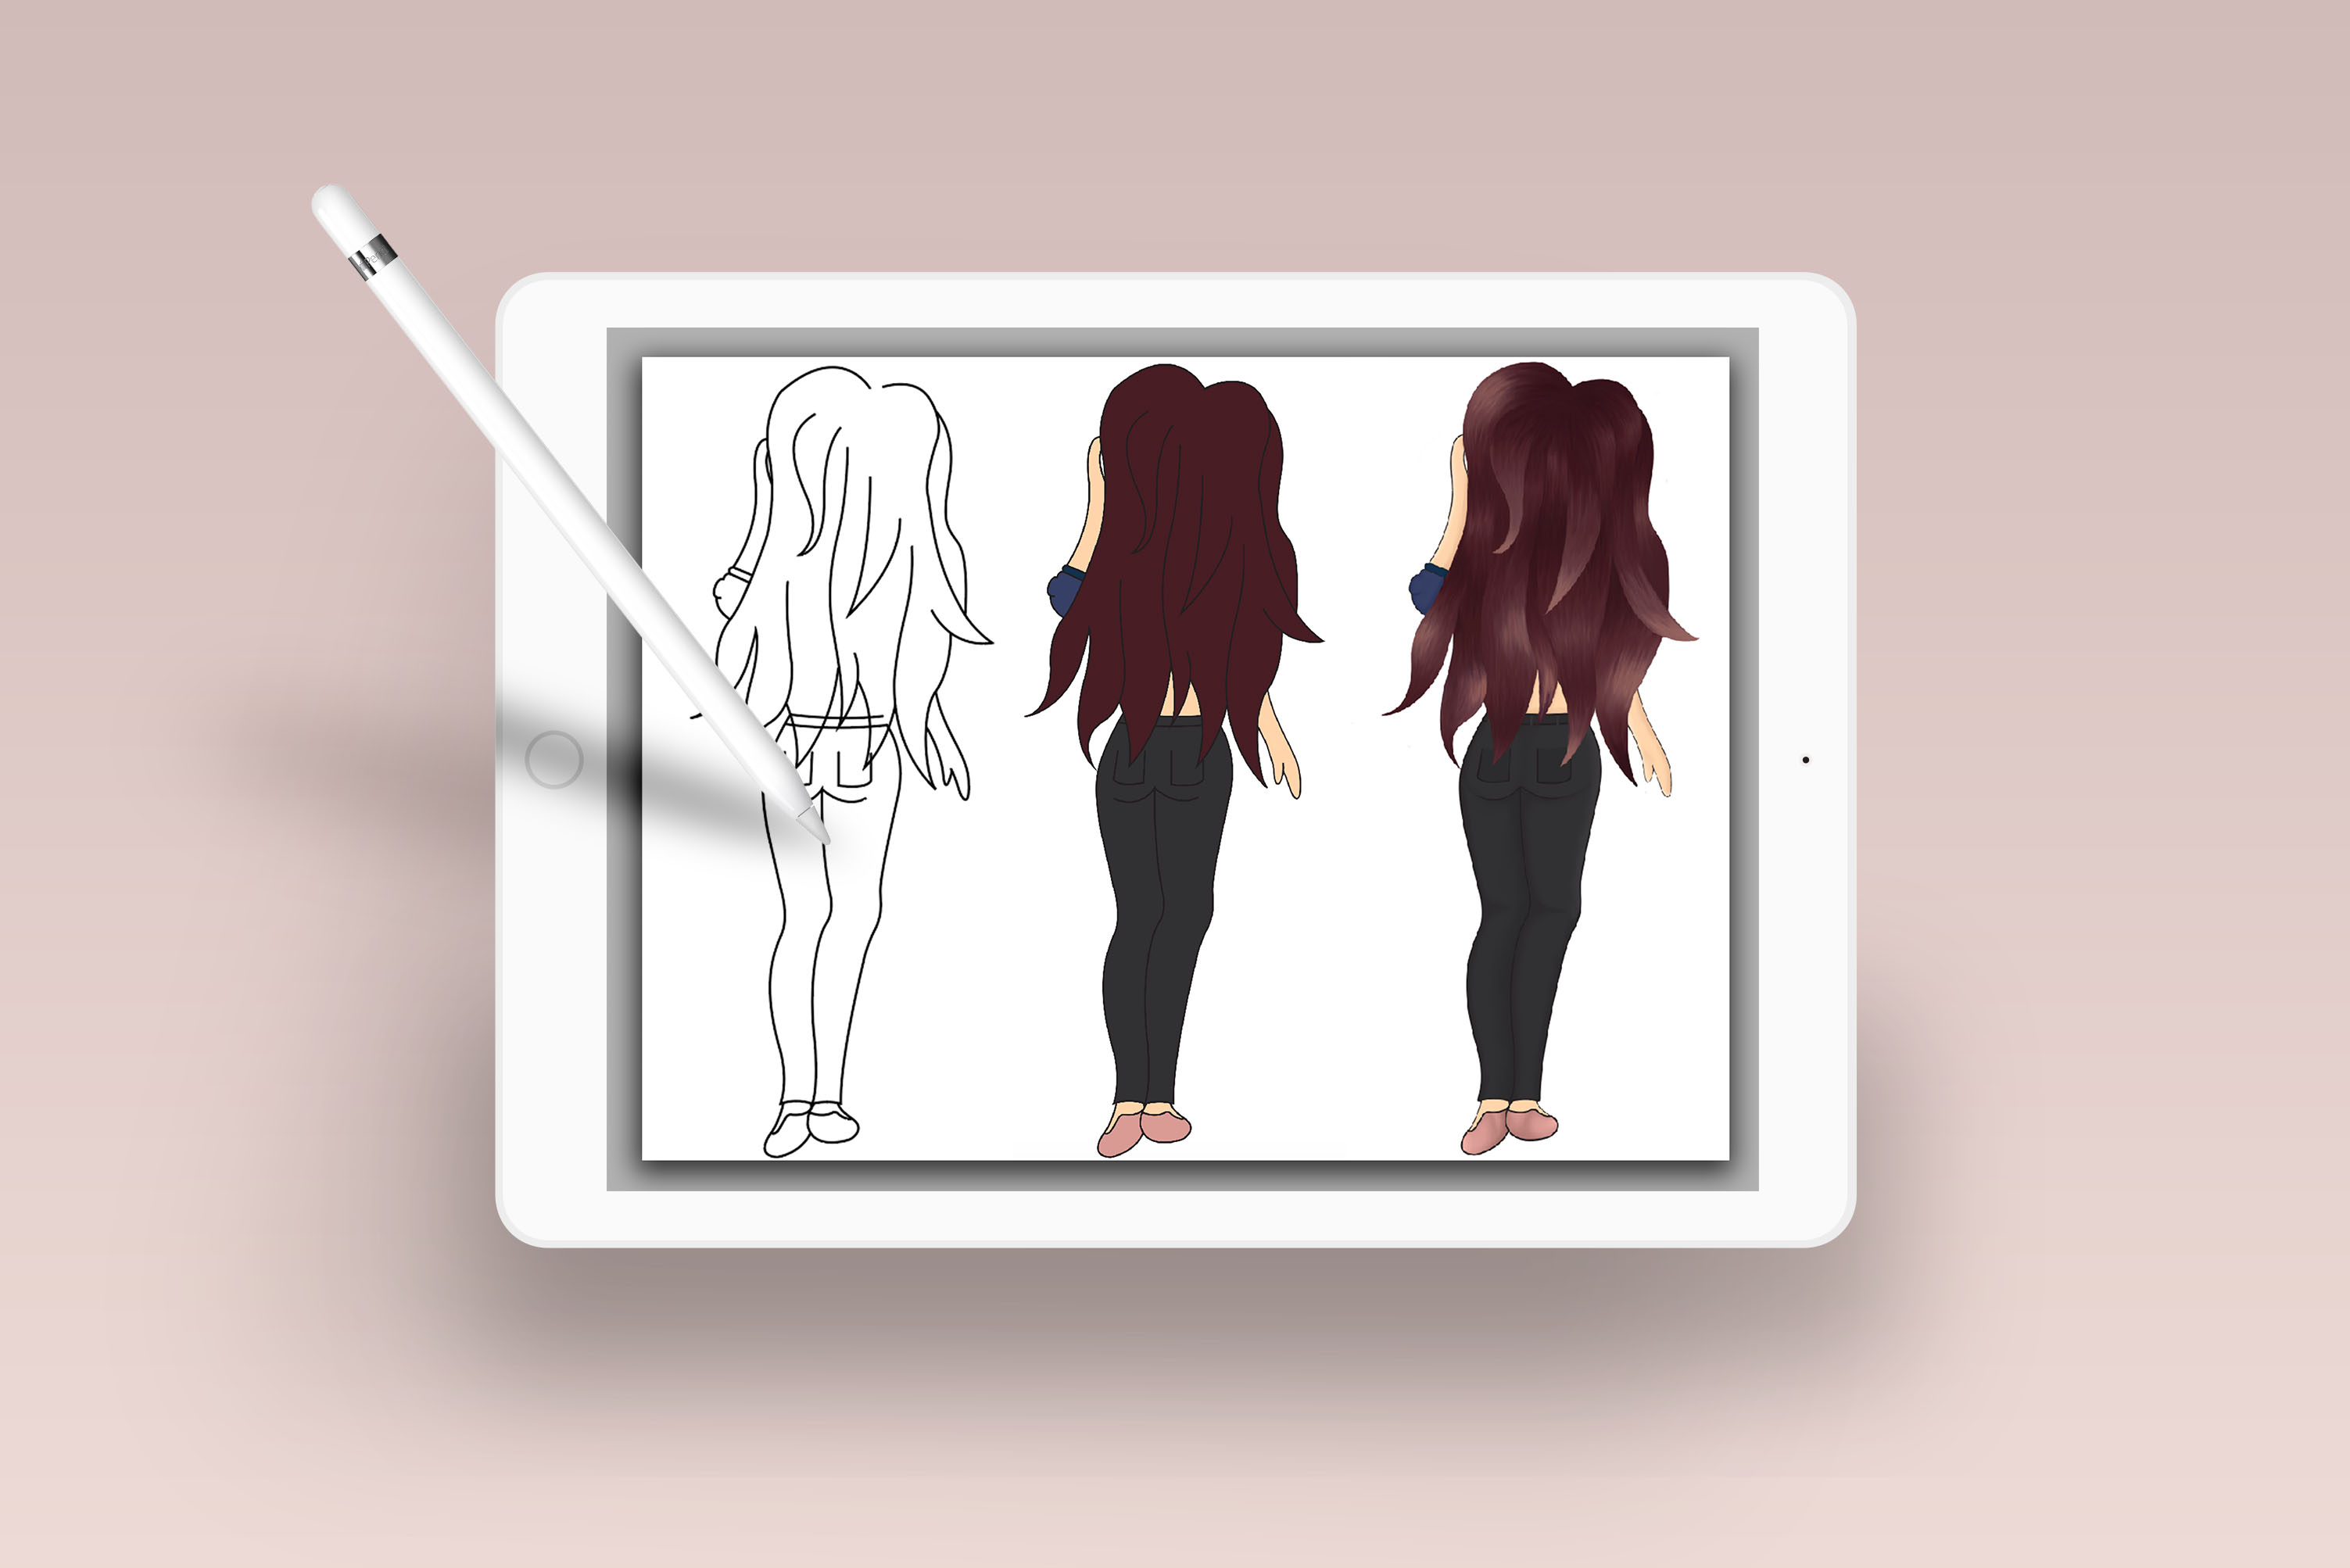
The next step was to scan my drawings in to digitalise them and add colour. Adding my drawing into Illustrator and live tracing it to create smoother, more solid lines to work with. I then transfer the smart layer over to photoshop to add colour. Just using the fil tool to get the background and the brush tool to fine tune any bits missed.
I start to create a colour chart to add depth to each element of my character. I start with shading the skin, dropping a few shades for shadows and 2 shades lighter for highlights, then finding colour matches in between. Using the brush tool these colours are applied in the obvious places and I use the smudge tool to blend them together. Repeating this for each aspect, blues for the jumper, black for her jeans and pinks and purples for her hair. When colouring the hair I use a much smaller brush size to create hair like strokes to make it a little bit more realistic.
Final Character
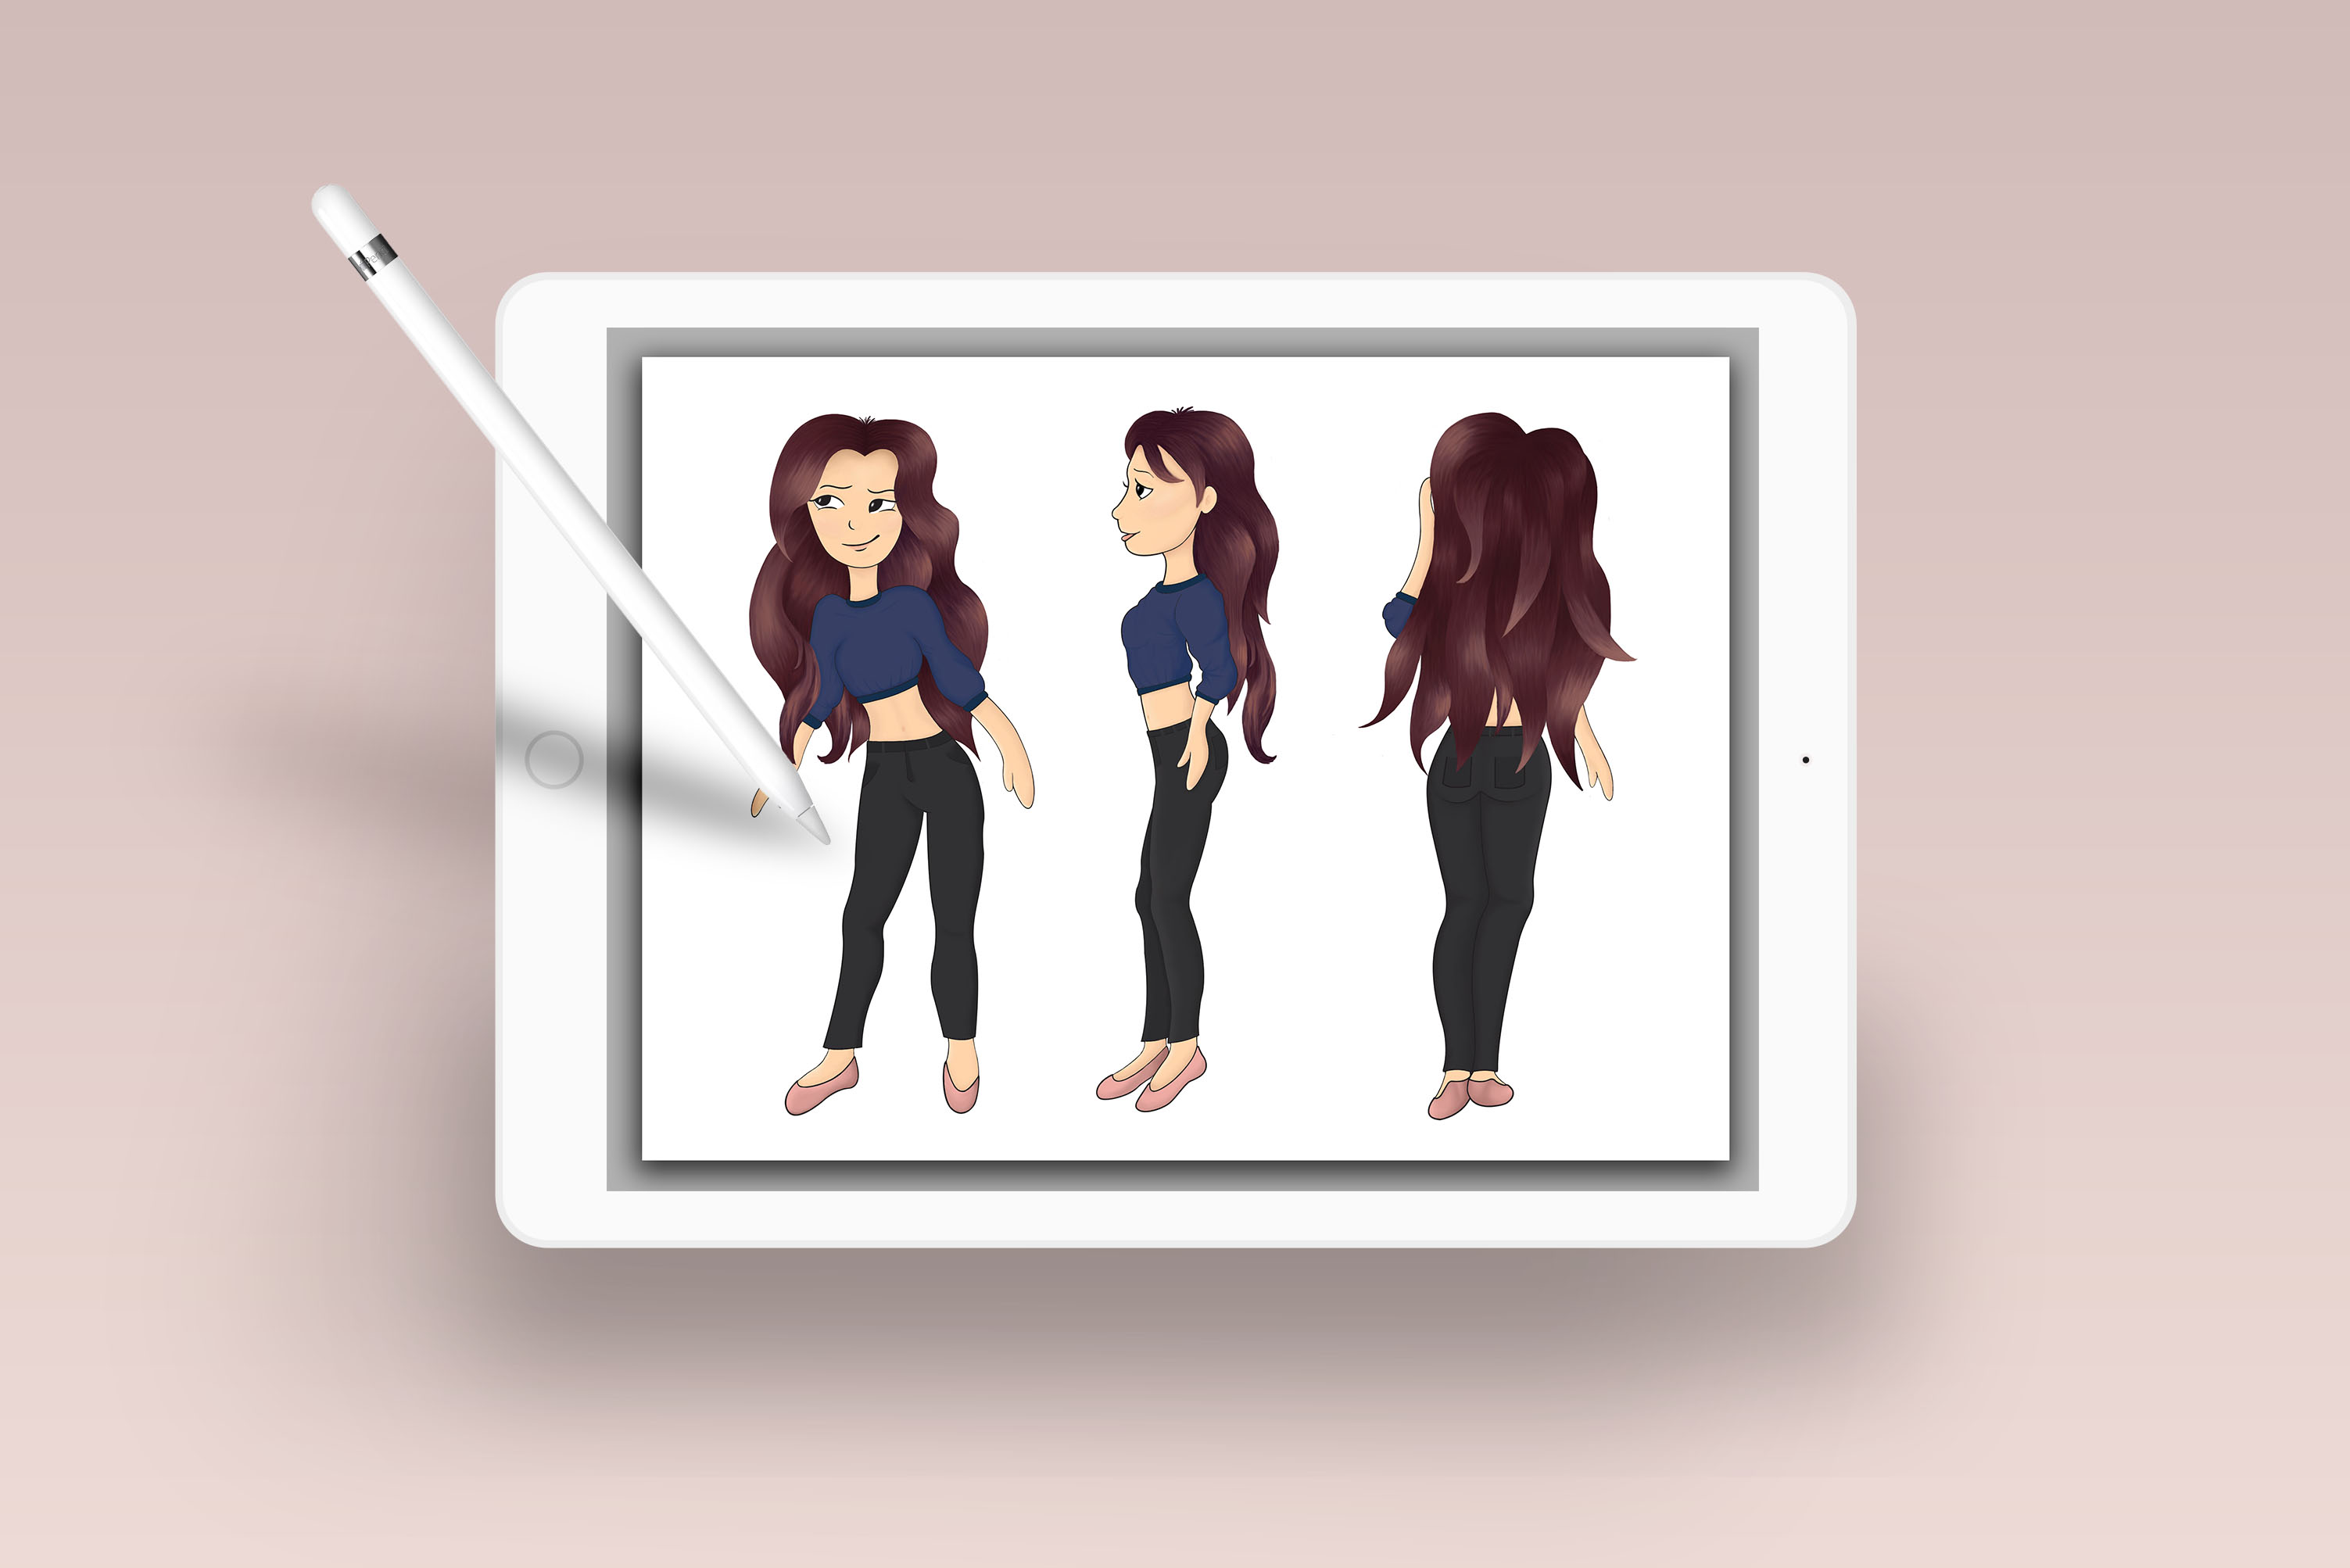
This is my final character, I’ve added further highlights and blended any harsh lines and got rid of heavy black outlines. Repeating the same steps for the front and side too. I’m really pleased with my final outcome for her, as you can see the development from circles on a piece of paper to a finalised character.
Having front, back and side scale perspective of my character means I could look into staging my character in 3D and having a more advanced animation. The plan is to learn to animate a walk cycle first.

Ready for Animation
This was something a little bit confusing for me and I did have to use YouTube to find tutorials on how to go about getting my character ready for animation. Every joint or point of movement needed to be broken down in order for it to be animated with the ability of moving.
I separated the limbs of my character, having lower right arm, lower left arm, upper right arm and upper right arm. Left foot, right foot, left calf, right calf, left thigh, right thigh and her torso. This is so a walk cycle can be created.
Set Design
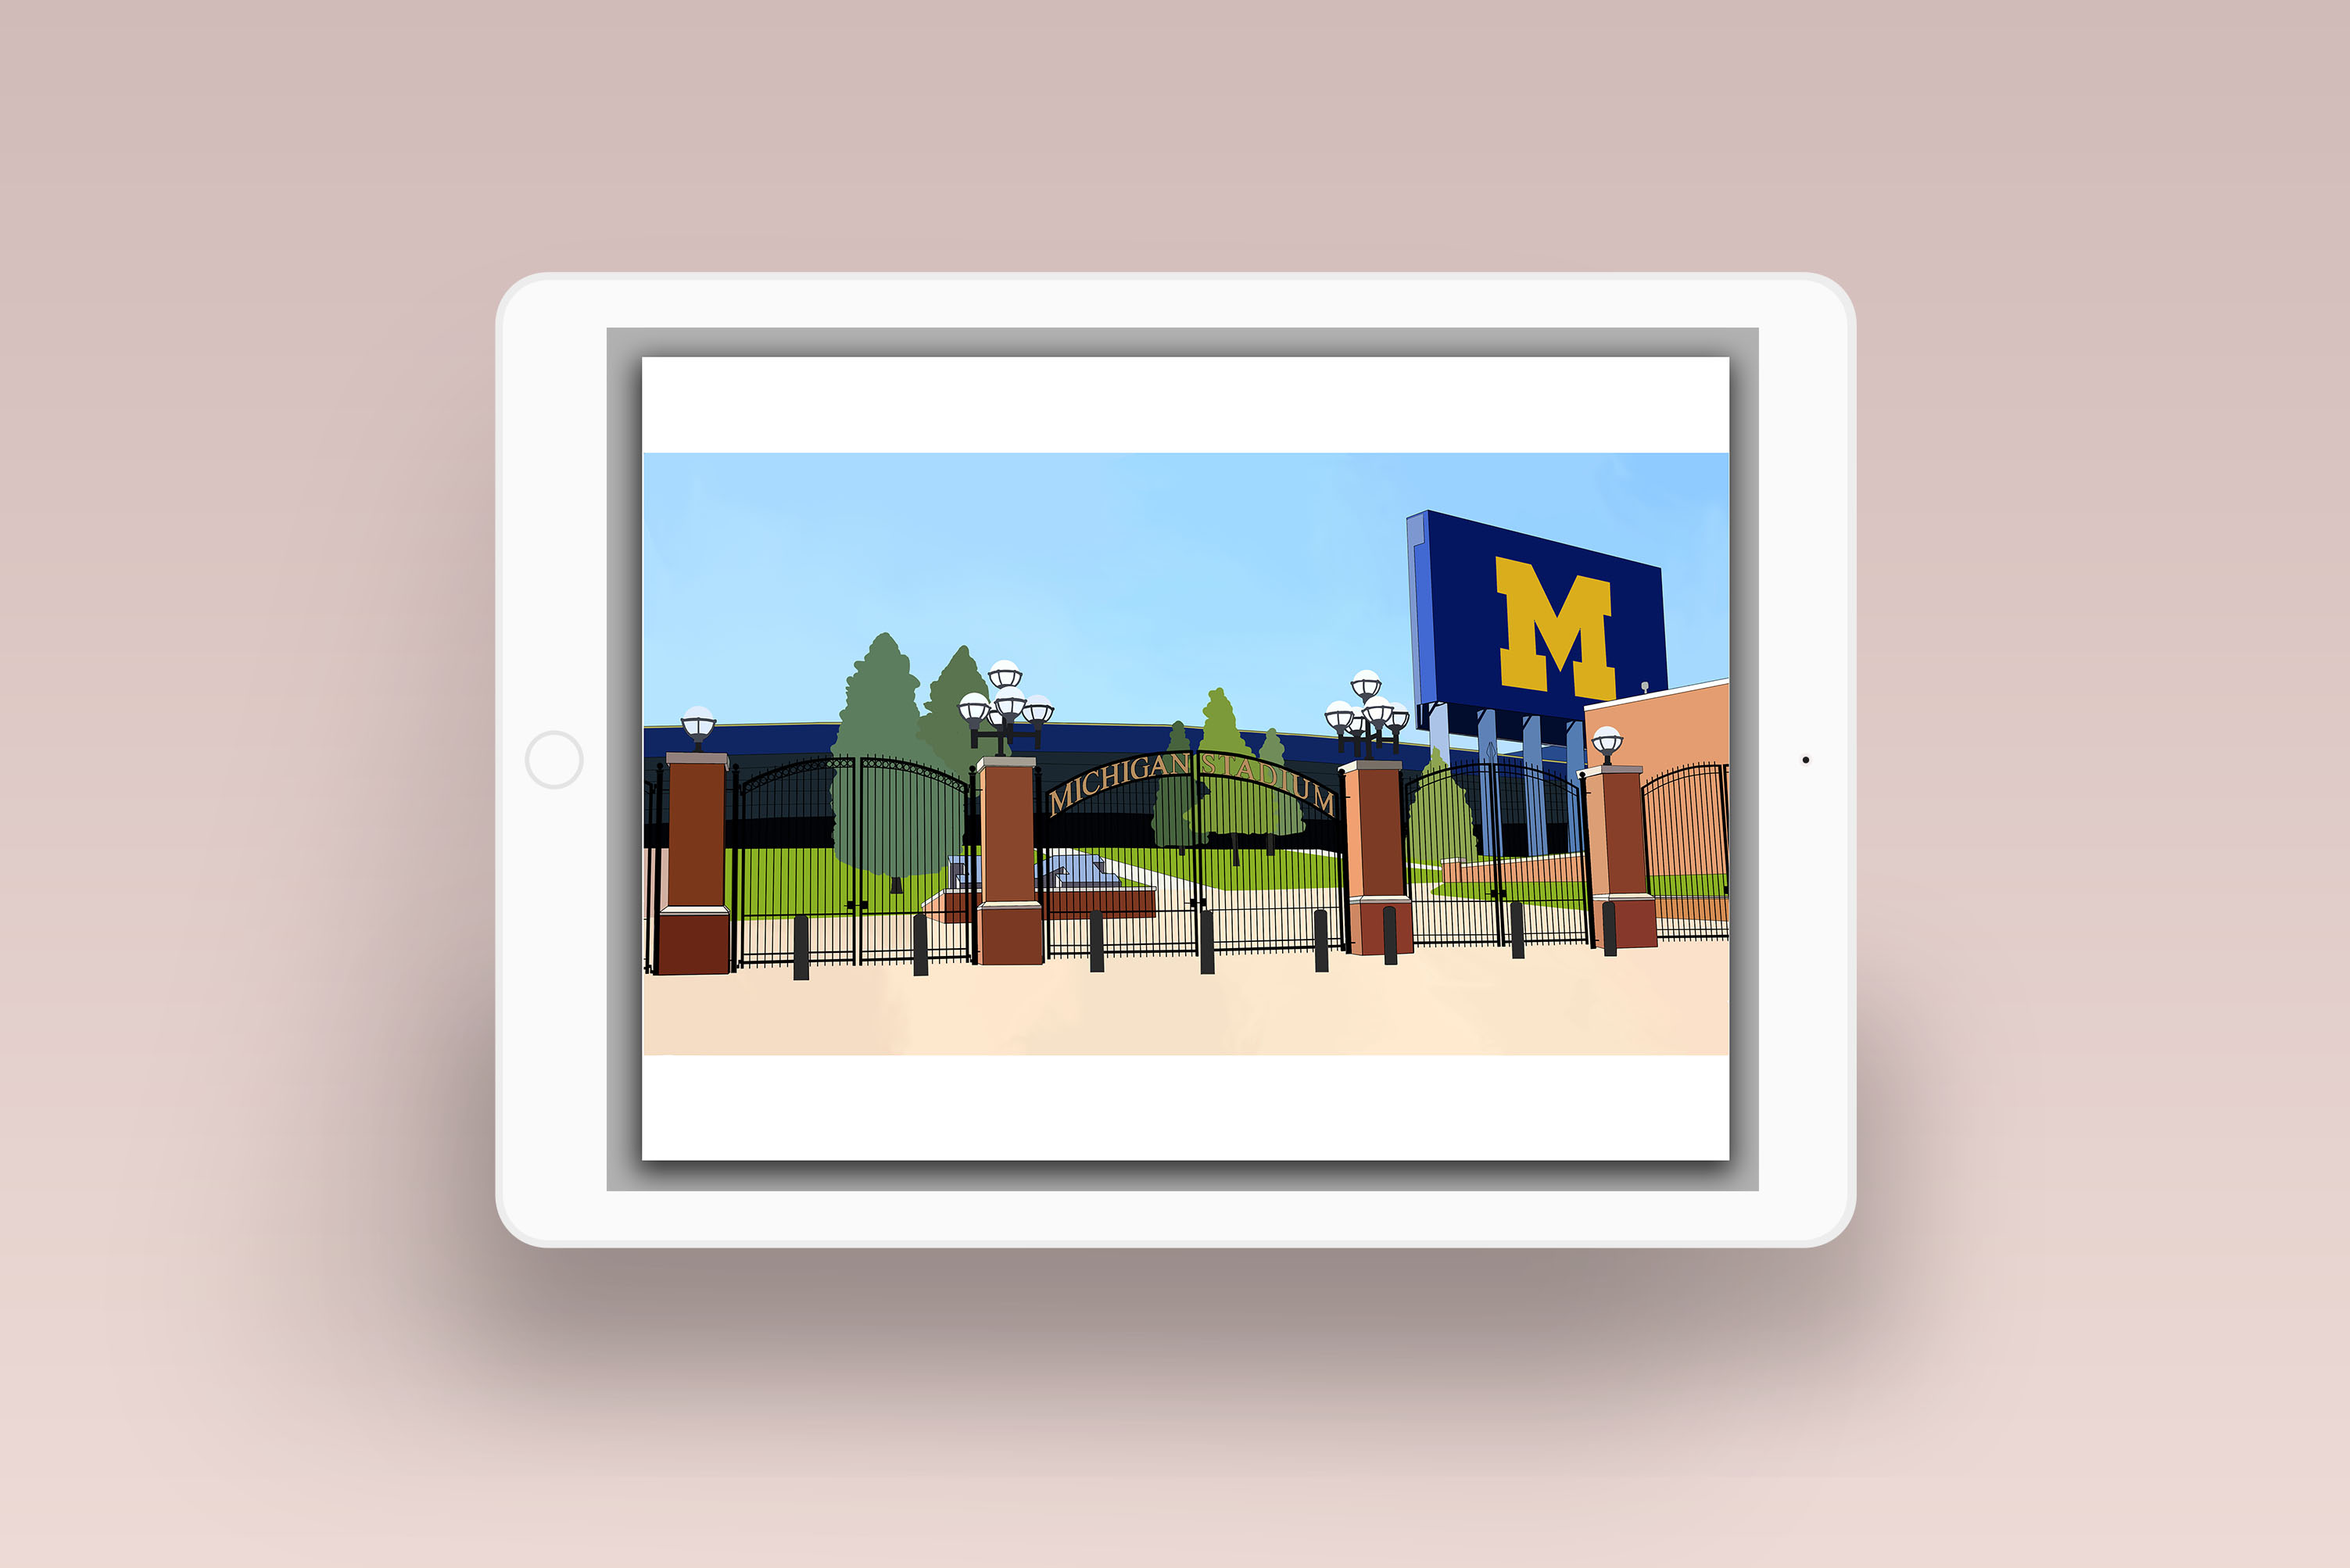
The next thing I designed was the background for my characters walk cycle, I had an idea of who and what she was and knew I wanted her to be a university student and cheerleader, I chose Michigan university. Finding a picture of the university’s stadium, as this is where my character would spend most of her time. I live traced in illustrator and added colour to form my background.
Pitch Bible
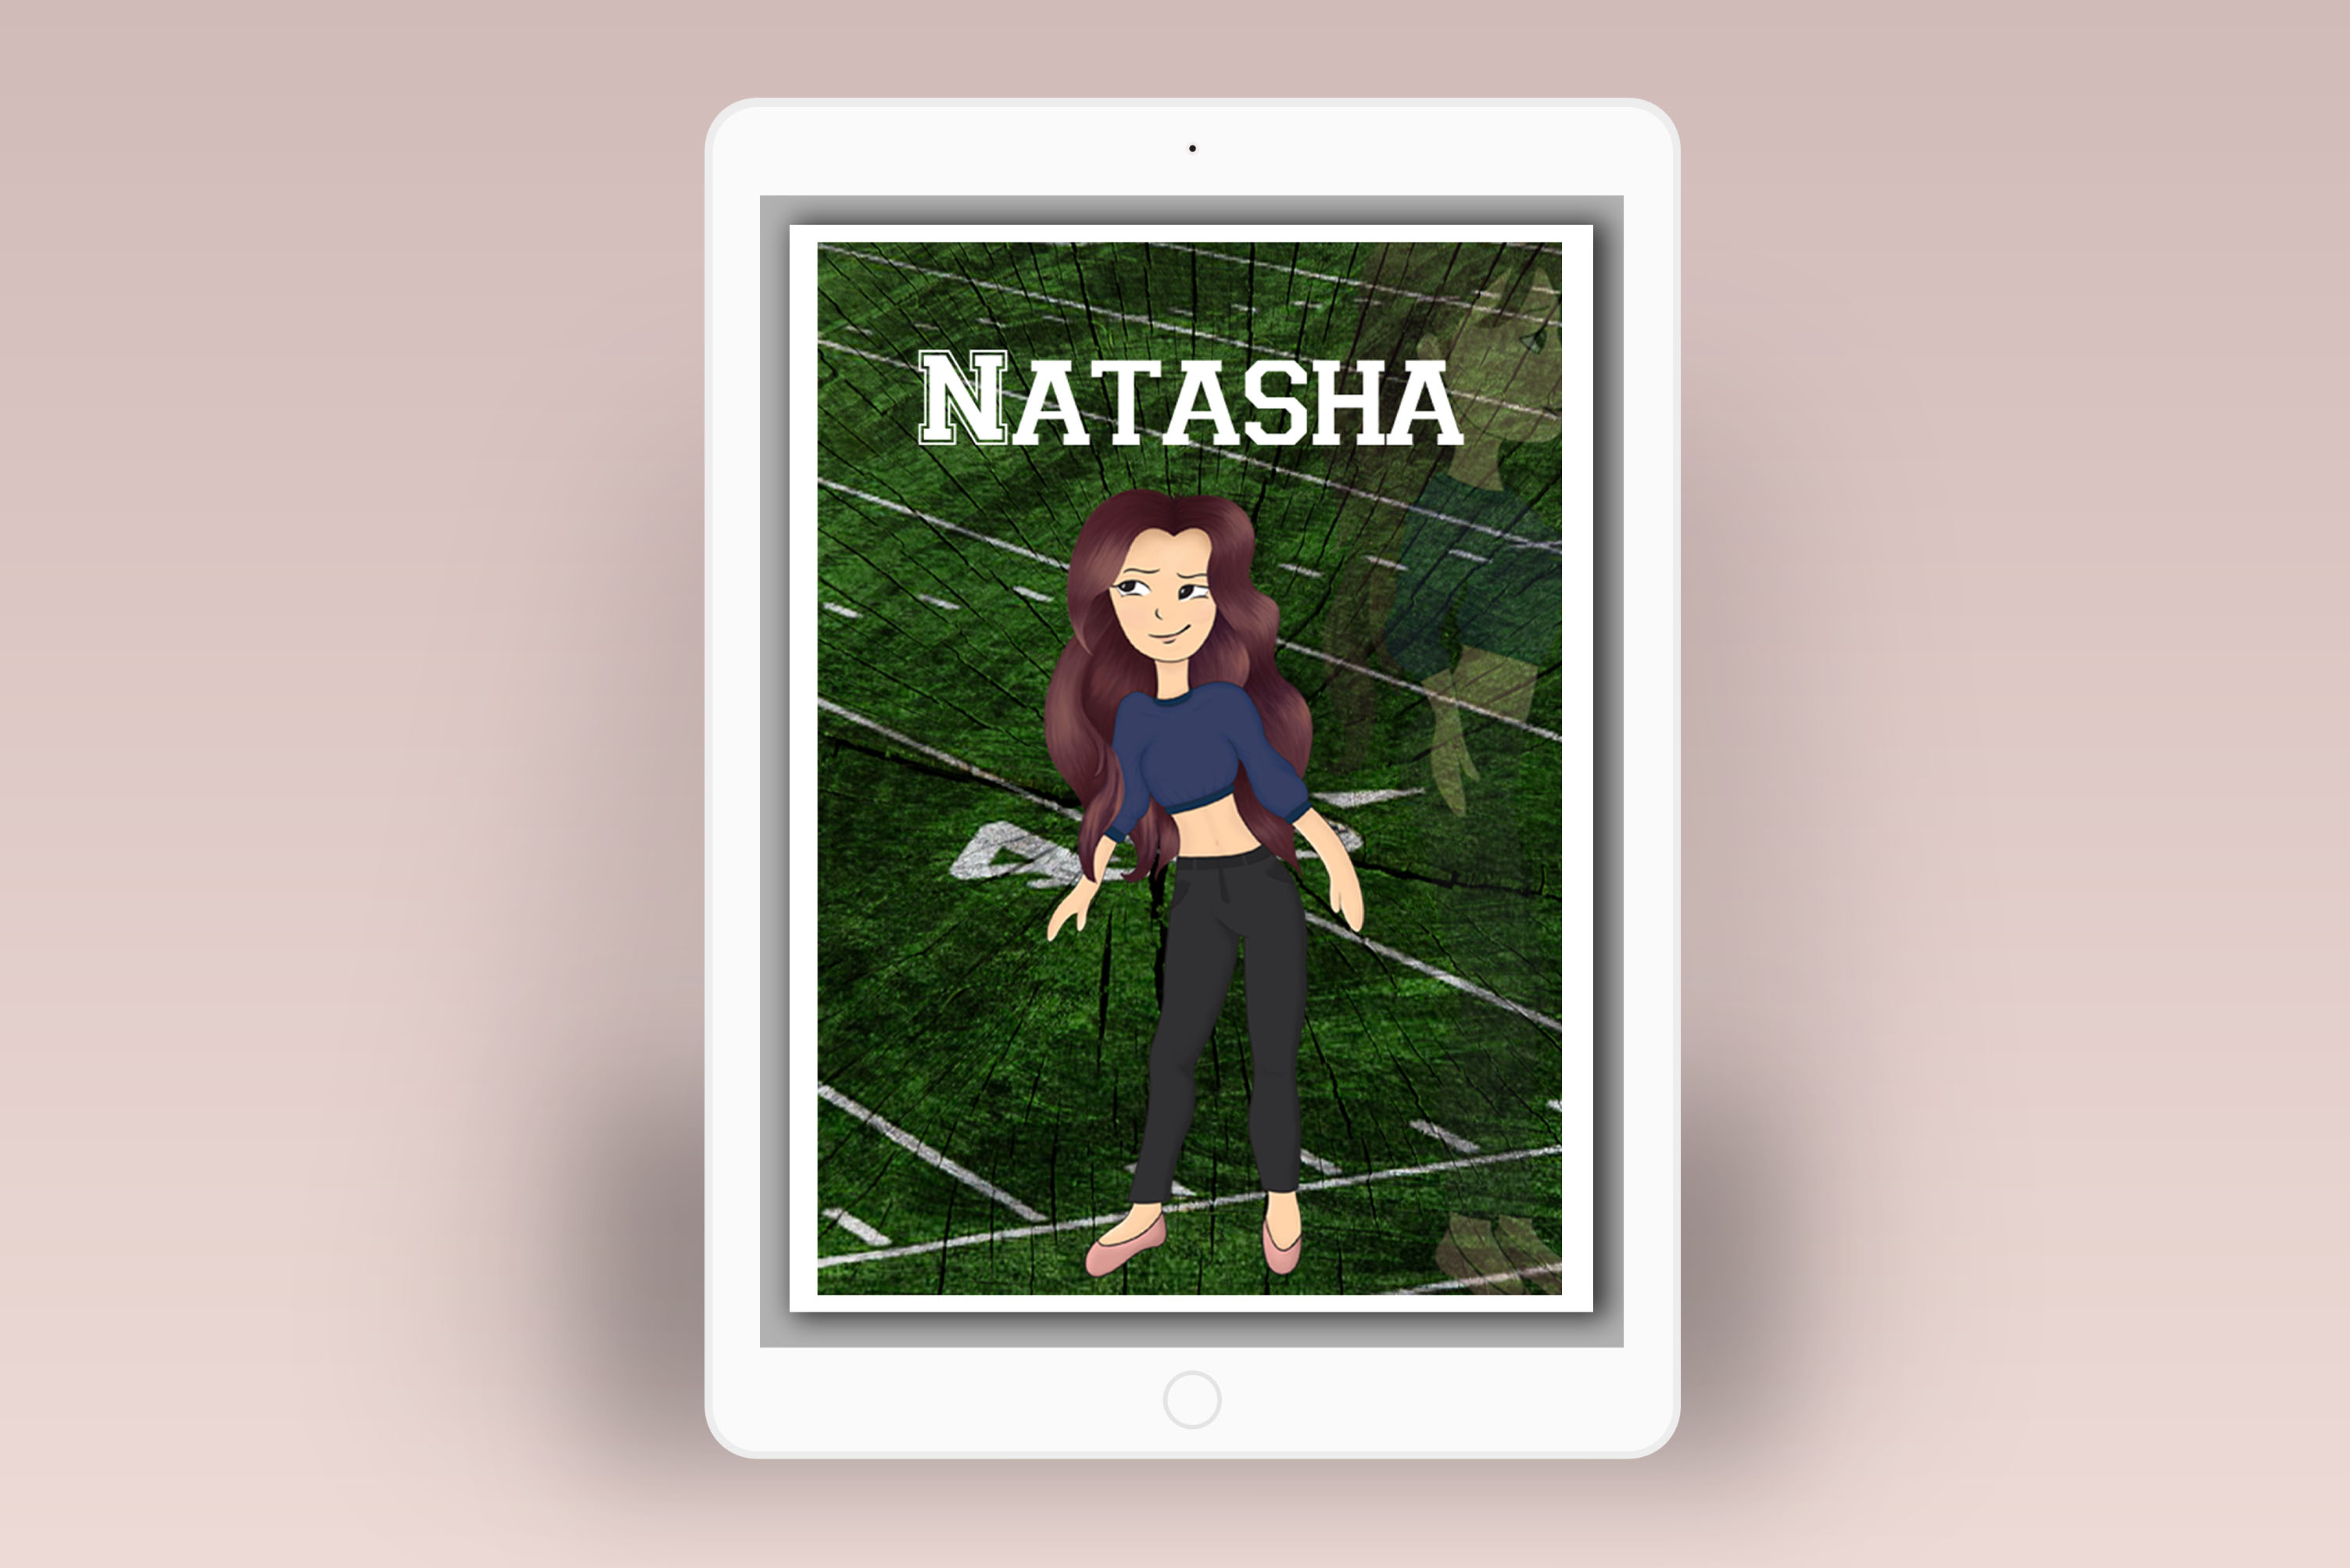
Finally I needed to show who my character was, a little bit about her and whether she was a film character, or a sprite for a game. So I created my pitch bible. This was a character poster I created for the tv programme Natasha would be the main character for.
"Natasha is 20 years old and a student at Michigan University studying Biology. She is also a flyer on the Michigan Wolverines cheer team.
Tasha is a very hard working girl, knows what she wants and doesn’t give up till she gets it. At first she seems shy but when you get to know her she’s very outgoing, friendly and a bit of nutter. Tash is very family orientated and goes home from college as often as she can. Specifically to see her sister Elsie and best friend Izzy.
Follow Natasha through her second year of college, the struggle of balancing cheer training and comps, school, relationships and keeping a social life. See how her life flips upside down when she finds out her boyfriend is cheating on her."
Brief
In this workshop we learnt about the fundamentals of 3D modelling, shading, texturing and lighting in 3D modelling programme, or a vector based 2D programme as well as 3D printing. Our brief was to produce a stylised 2D or 3D character; including all the stages of character production, from its design to creating a rigged model, ready to animate. Creating an animaton of our character.